Microsoft Office Picture Manager also known as the first ‘Picture Library’ was included in Microsoft Office in 2003. In 2007, it became part of SharePoint Designer. Now, you can install it as a standalone application for Windows 10, as it has not been part of Microsoft Office since 2013. Otherwise, use Photoshop or Luminar Neo as an alternative utility.
Microsoft Office Picture Manager Features
Easy to use
The basic task of the app is to offer multiple tools for quickly locating and incorporating pictures for projects of Office. You can easily discover, browse, and view photos for multiple purposes. Simply click on the ‘locate Pictures’ feature and search your photos, no matter where are they stored. It is used as a streamlined ‘photo viewer’ that enables the users to get editing tools for other apps. Enjoy auto-correcting photos using several editing tools such as noise reduction, sharpening, contrasting, red-eye removal, fast renaming with batch tools, saving, conversation, resizing, etc.
Manage Multiple Formats
Multiple file formats including BMP, JPG, PNG, PDF, TIFF, etc are part of the app for easily managing a wide range of images. You can handle more specific content while using innovative editing tools. It is simple to use an animated format while loading the GIF images. It also offers an organized library for users to create folders, rename files, date-wise picture searching, size, and so on.
Fast Sharing
The powerful sharing option “Sharing Pictures” enables the users to share pictures using e-mail attachments. Likewise, use the option ‘Create a Picture Library’ with incorporation of ‘intranet’ a network within an organization that has the facility of using HTTP or FTP protocol. You can easily use ‘Hyperlinks’ on the intranet for exploring objects, documents, pages, and other such locations.
Flawless Editing
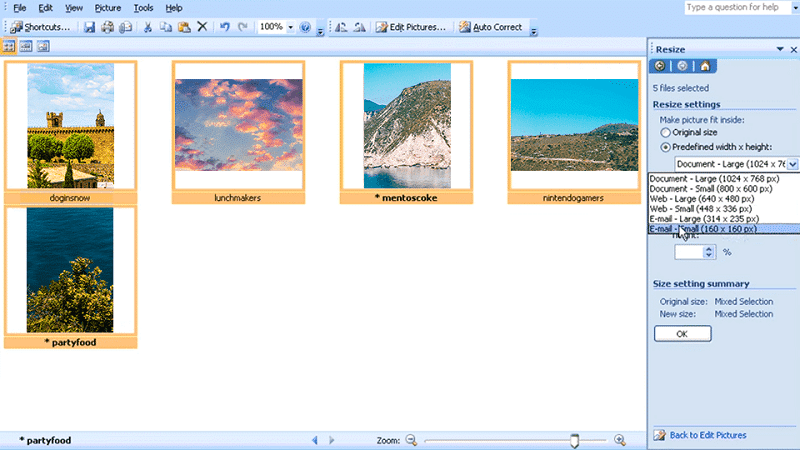
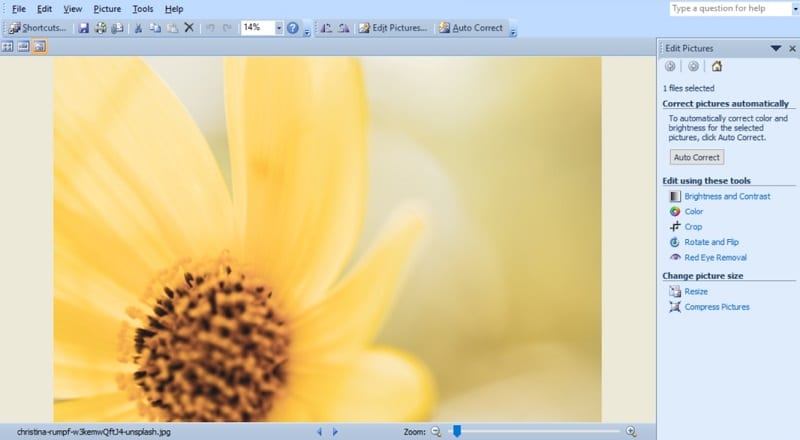
The wide range of basic tools including multiple advanced tools allows you to edit your pictures flawlessly. You can crop, resize, rotate, and flip your pictures while adjusting the brightness, and contrast, and modifying color levels to improve the appearance of your image.
Red-eye Removal
Most commonly, the flashlight of your camera can cause a dreaded red-eye. It irritates me a lot, but nothing was solved earlier. Don’t worry, now you can fix the issue by using the tool to detect the red-eye, if it occurred, and remove it easily to give your portrait a natural style.
Batch Editing Process
No need to select the photos one by one and apply editing tools exclusively. Simply select the ‘Batch Processing’ option, select a group of photos, and let the app apply the same tools on them simultaneously.
Quick Access
The app by default offers multiple features for you to easily add and search your photos. You can click the ‘Thumbnails’ option and the list will be displayed with stored photos inside the Picture folder. The list is automatically refreshed as soon as you add a new photo in the library. Next is ‘Filmstrip View’ mode helps you to manage your files, ‘Single Picture View’ is for displaying the pictures in full size, and watching a picture exclusively without going to the Thumbnail list.
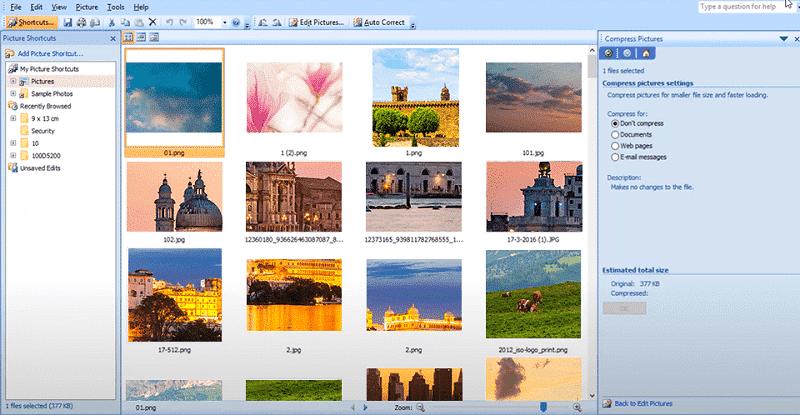
Compression Options
Documents, Web pages, and E-mail messages are three ways of compressing your pictures to change them into suitable size. You also have the option of ‘Comparison Pictures’ that compares the original size and compressed size to make it easy to select any one.
How to Install Microsoft Picture Manager on Windows 10
As we aforementioned, the app is not part of Microsoft Office, but you can download it for Windows 10 via SharePoint Designer 2010. Simply follow the given steps;
- Open the Microsoft SharePoint 2010 32-bit installer, and tap to ‘Download’ button given on the page.
- Select the destination for saving the file, otherwise, tap on the default location which is ‘Downloads’.
- Start installing SharePointDesigner by double-clicking the .exe file.
- Click on the ‘customize’ option to avoid installing all elements of SharePoint Designer.
- Click on ‘Microsoft Office Picture Manager’ from the dropdown menu by disabling the installation of Microsoft SharePoint Designer and Office Shared Features.
- Click on ‘Run from my computer’ and next click on ‘Install Now’ from the right bottom of the screen.
- Tap to ‘Windows Start’ button, and go to recently added list.
- Click on Microsoft Office Picture Manager’ to open the app on your system.
How to use Microsoft Office Picture Manager
- Complete installation process, and tap to app’s icon to launch it on your system.
- Select ‘File’ option, and import picture by clicking ‘Add Picture Shortcuts’ option.
- You can use the drag & drop option for the purpose also.
- Start applying of editing tools to adjust the faulty issues of your picture.
Final Words
All-in-all, Microsoft Office Picture Manger is the best solution of using editing tools, even for other apps on your system. Despite disconnectivity with MS Office, it offers a friendly environment for editing your pictures with help of several editing tools and files formats, and shares them using three most authentic sharing platforms.
FAQs
Yes, now the app is available as standalone app for Windows 10.
No, the app is only for Windows, Mac users can use other alternatives including Adobe Lightroom, Apple Photos, etc.
No, there is not any support for ‘Raw’ image format available in the app.
Yes, you will find a comparison feature that helps you to select the edited or non-edited photo.
Unfortunately, the app is not directly integrated with social media, but you can save your image, and then upload on social media.