When diagnosing an inactive internet connection, If you’re running Windows 10 and getting the “Wifi Doesn’t Have a Valid IP Configuration” error, you know how frustrating it can be. This disables WiFi access and is a common problem among Windows users. Even if you use an Ethernet connection on your computer, the problem of not having a valid IP configuration can occur. The good news is that this issue is simple to resolve.
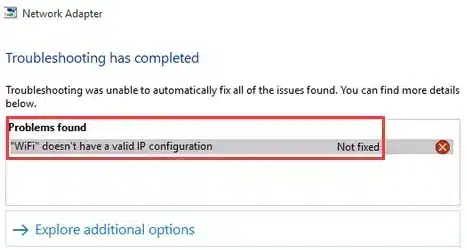
If restarting your computer didn’t resolve the issue (try it if you haven’t already), the troubleshooting tips that follow should assist you in resolving the issue.
11 Steps to Fix Wifi Doesn’t Have a Valid IP Configuration
- Reboot the Router
- Change the SSID and Password on the Router
- Wireless Network Adapter Reset
- Automatically obtain the IP address
- Wireless Network Adapter should be updated
- Network Adapter Troubleshooter
- PC IP Lease Should Be Renewed
- TCP/IP Stack should be reset
- Reset the network settings on your computer
- Is Your Wi-Fi IP Configuration Correct
- Wireless Network Adapter must be reinstalled
1) Reboot the Router
The “Wi-Fi doesn’t have a valid IP configuration” error is most commonly caused by random router faults. Restarting your router is the solution.
To begin, turn off the router. Then, before turning it back on, wait at least 10 seconds. Check if you can access the internet without problems after your computer re-establishes its Wi-Fi connection.
2) Change the SSID and Password on the Router
Changing your router’s SSID and password is another way to fix the “Wi-Fi doesn’t have a valid IP configuration” error. To do so, go to the router’s settings page.
To access the router’s settings, you’ll need the gateway IP, username, and password. The information is usually printed on a label on the router itself.
- In a new browser tab, type the gateway IP and press Enter in Chrome, Firefox, or Edge.
- Enter the username and password for the router.
- Change the SSID and password on the router by sifting through the settings. Then save your modifications.
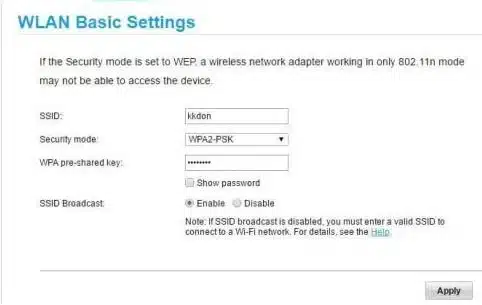
After that, you’ll need to change the SSID and password on your PC’s connection to the router. Don’t forget to update the network on all connected devices as well.
3) Wireless Network Adapter Reset
Another effective solution for connectivity issues in Windows 10 is to disable and then enable your PC’s wireless network adapter.
- Open the Run box by pressing Windows+R.
- Select OK after typing ncpa.cpl.
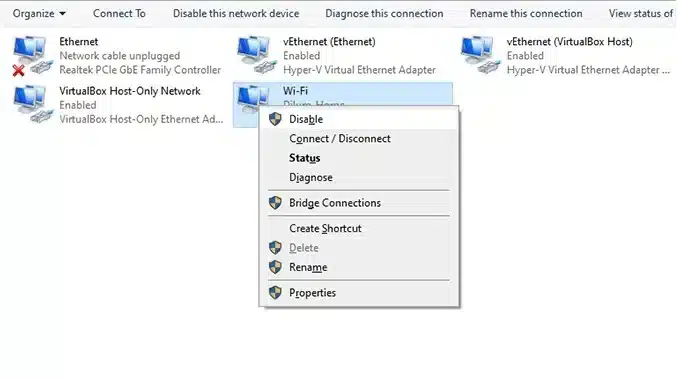
- Right-click the wireless network adapter and select Disable once the Network and Sharing Center appears on the screen.
- Hold your breath for up to ten seconds.
- Select Enable from the Wi-Fi adapter’s right-click menu.
4) Automatically obtain the IP address
Have you assigned a custom IP address and DNS settings to your PC’s wireless network adapter? If this is the case, you should return to getting them automatically.
1. Open the Run box by pressing Windows+R. Then, select OK after typing ncpa.cpl.
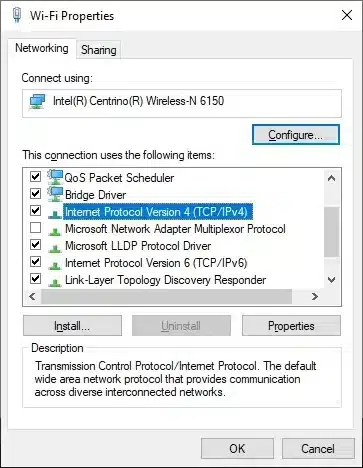
2. Select Properties from the Wi-Fi adapter by right-clicking it.
3. Double-click Internet Protocol Version 4 (TCP/IPv4) Properties on the Networking tab.
4. Select the radio buttons next to Automatically obtain an IP address and Automatically obtain DNS server address.
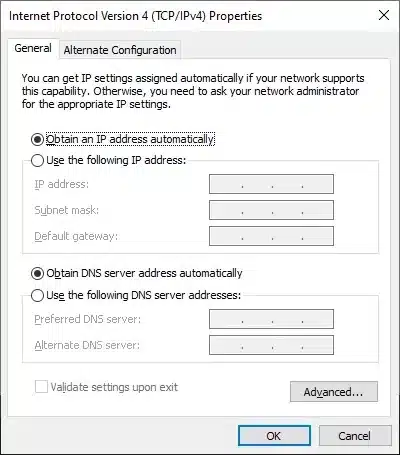
5. For Internet Protocol Version 6 (TCP/IPv6) Properties, repeat steps 3 and 4.
5) Wireless Network Adapter should be updated
You must update the wireless network adapter’s driver if disabling and reinstalling it did not help. By default, Windows 10 installs a generic driver, but it’s a good idea to download the most recent version from the device manufacturer’s website. To do so, you’ll need a device with an active internet connection.
Simply run the driver setup file after downloading and transferring it, and follow the on-screen instructions to update the wireless network adapter.
6) Network Adapter Troubleshooter
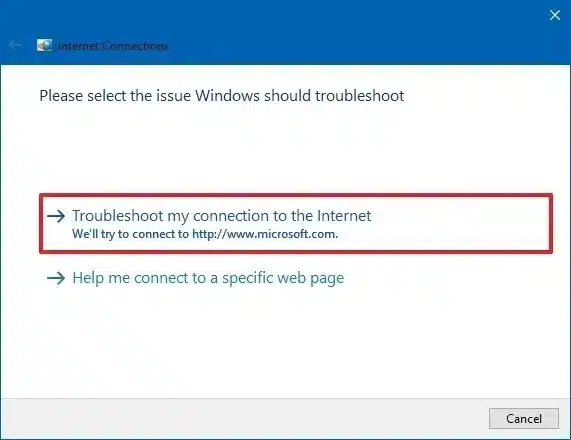
Now that you’ve gone through a significant number of fixes, it’s time to use Windows 10’s network troubleshooter to diagnose your Wi-Fi connection once more.
1. Select Network Connections by pressing Windows+X.
2. Select Network troubleshooter from the drop-down menu.
7) PC IP Lease Should Be Renewed
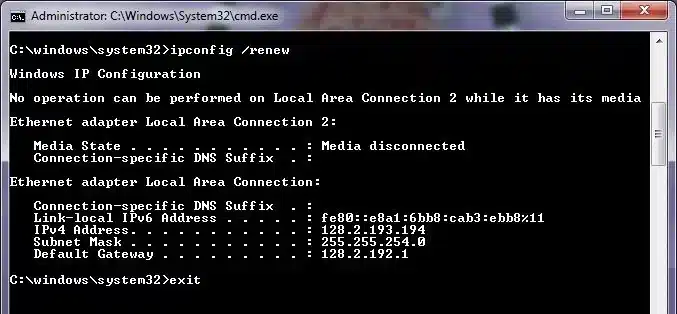
If restarting the router or disabling/enabling the wireless network adapter didn’t fix the problem, force your computer to renew its IP lease. You can do this by using Windows PowerShell to run a series of commands.
- Select Windows PowerShell by pressing Windows+X.
- While pressing the Enter key, run the commands below one by one:
- ipconfig /release
- ipconfig /flushdns (optional)
- ipconfig /renew
8) TCP/IP Stack should be reset
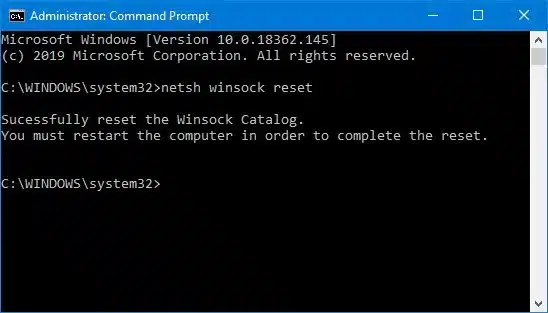
If renewing the IP lease doesn’t work, try resetting the TCP/IP stack on your PC. This necessitates running a few commands once more, but this time through an elevated Windows PowerShell console.
- Select Windows PowerShell by pressing Windows+X. (Admin).
- While pressing Enter, run the commands below one by one:
- Restart the computer after exiting the Command Prompt console. If the error was caused by a corrupted TCP/IP stack, you should be able to connect to the internet without issue.
- netsh winsock reset catalog
- netsh int ip reset
9) Reset the network settings on your computer
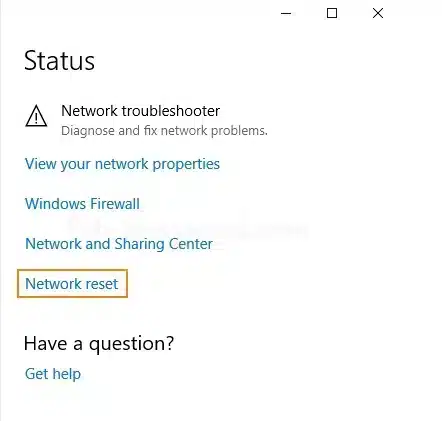
It’s time to re-configure your computer’s network settings. That should restore all network-related settings to their defaults, effectively patching out any incorrect or corrupt configurations.
- Select Network Connections by pressing Windows+X.
- Select Reset Network.
- Select Reset Now from the drop-down menu.
Reconnect to Wi-Fi after resetting the network settings, and you should no longer get the “Wi-Fi doesn’t have a valid IP configuration” error.
10) Is Your Wi-Fi IP Configuration Correct?
Restarting the router, resetting the wireless network adapter, or renewing the IP lease will usually fix the “Wi-Fi doesn’t have a valid IP configuration” error. However, if the problem reappears after some time, we recommend that you try some of the advanced fixes listed above until it is permanently resolved.
11) Wireless Network Adapter must be reinstalled
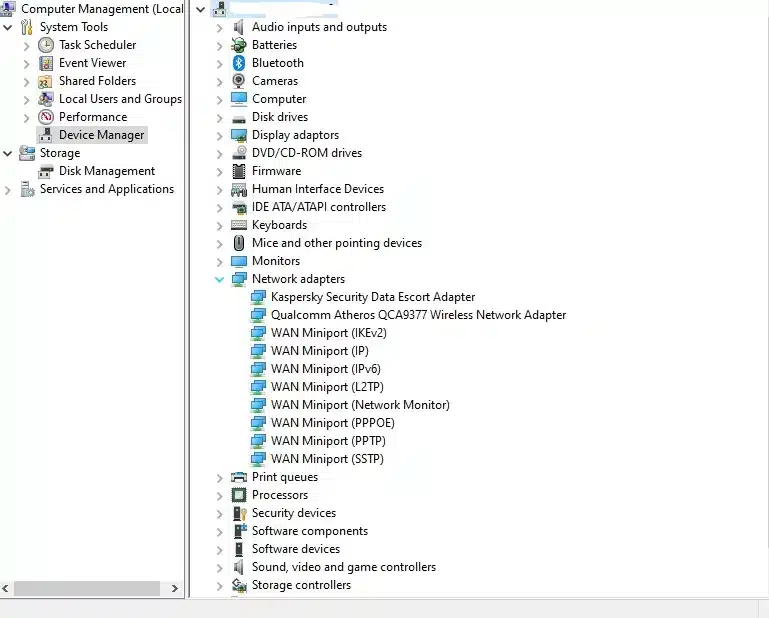
If the error message “Wi-Fi doesn’t have a valid IP configuration” persists, your computer’s wireless network adapter must be uninstalled and reinstalled. That eliminates the possibility of a corrupted driver.
- Select Device Manager by pressing Windows+X.
- Increase the number of network adapters.
- Select Disable device from the context menu of your wireless network adapter.
- Choose Yes.
- Select Uninstall device from the context menu of the wireless network adapter.
- Reboot your computer, and the wireless network adapter should be reinstalled automatically.
